Push-To-Talk
In this guide, we’ll cover how to implement Push-To-Talk functionality in the Unreal Engine using the ODIN plugin. This feature is crucial for multiplayer games where players might want to control when they are heard. We’re assuming you already have a working ODIN implementation using the Odin Audio Capture object. If not, take a look at the quick overview below.
By David Liebemann at SciCode Studio.
Creating an Odin Audio Capture
To implement Push-To-Talk functionality, instead of using the default Create Audio Capture method, we’ll use the Create Odin Audio Capture
function call. This will create an extended Audio Capture object, that allows us to use the Is Capturing Paused
parameter.
The logic for joining an Odin room should look something like this:
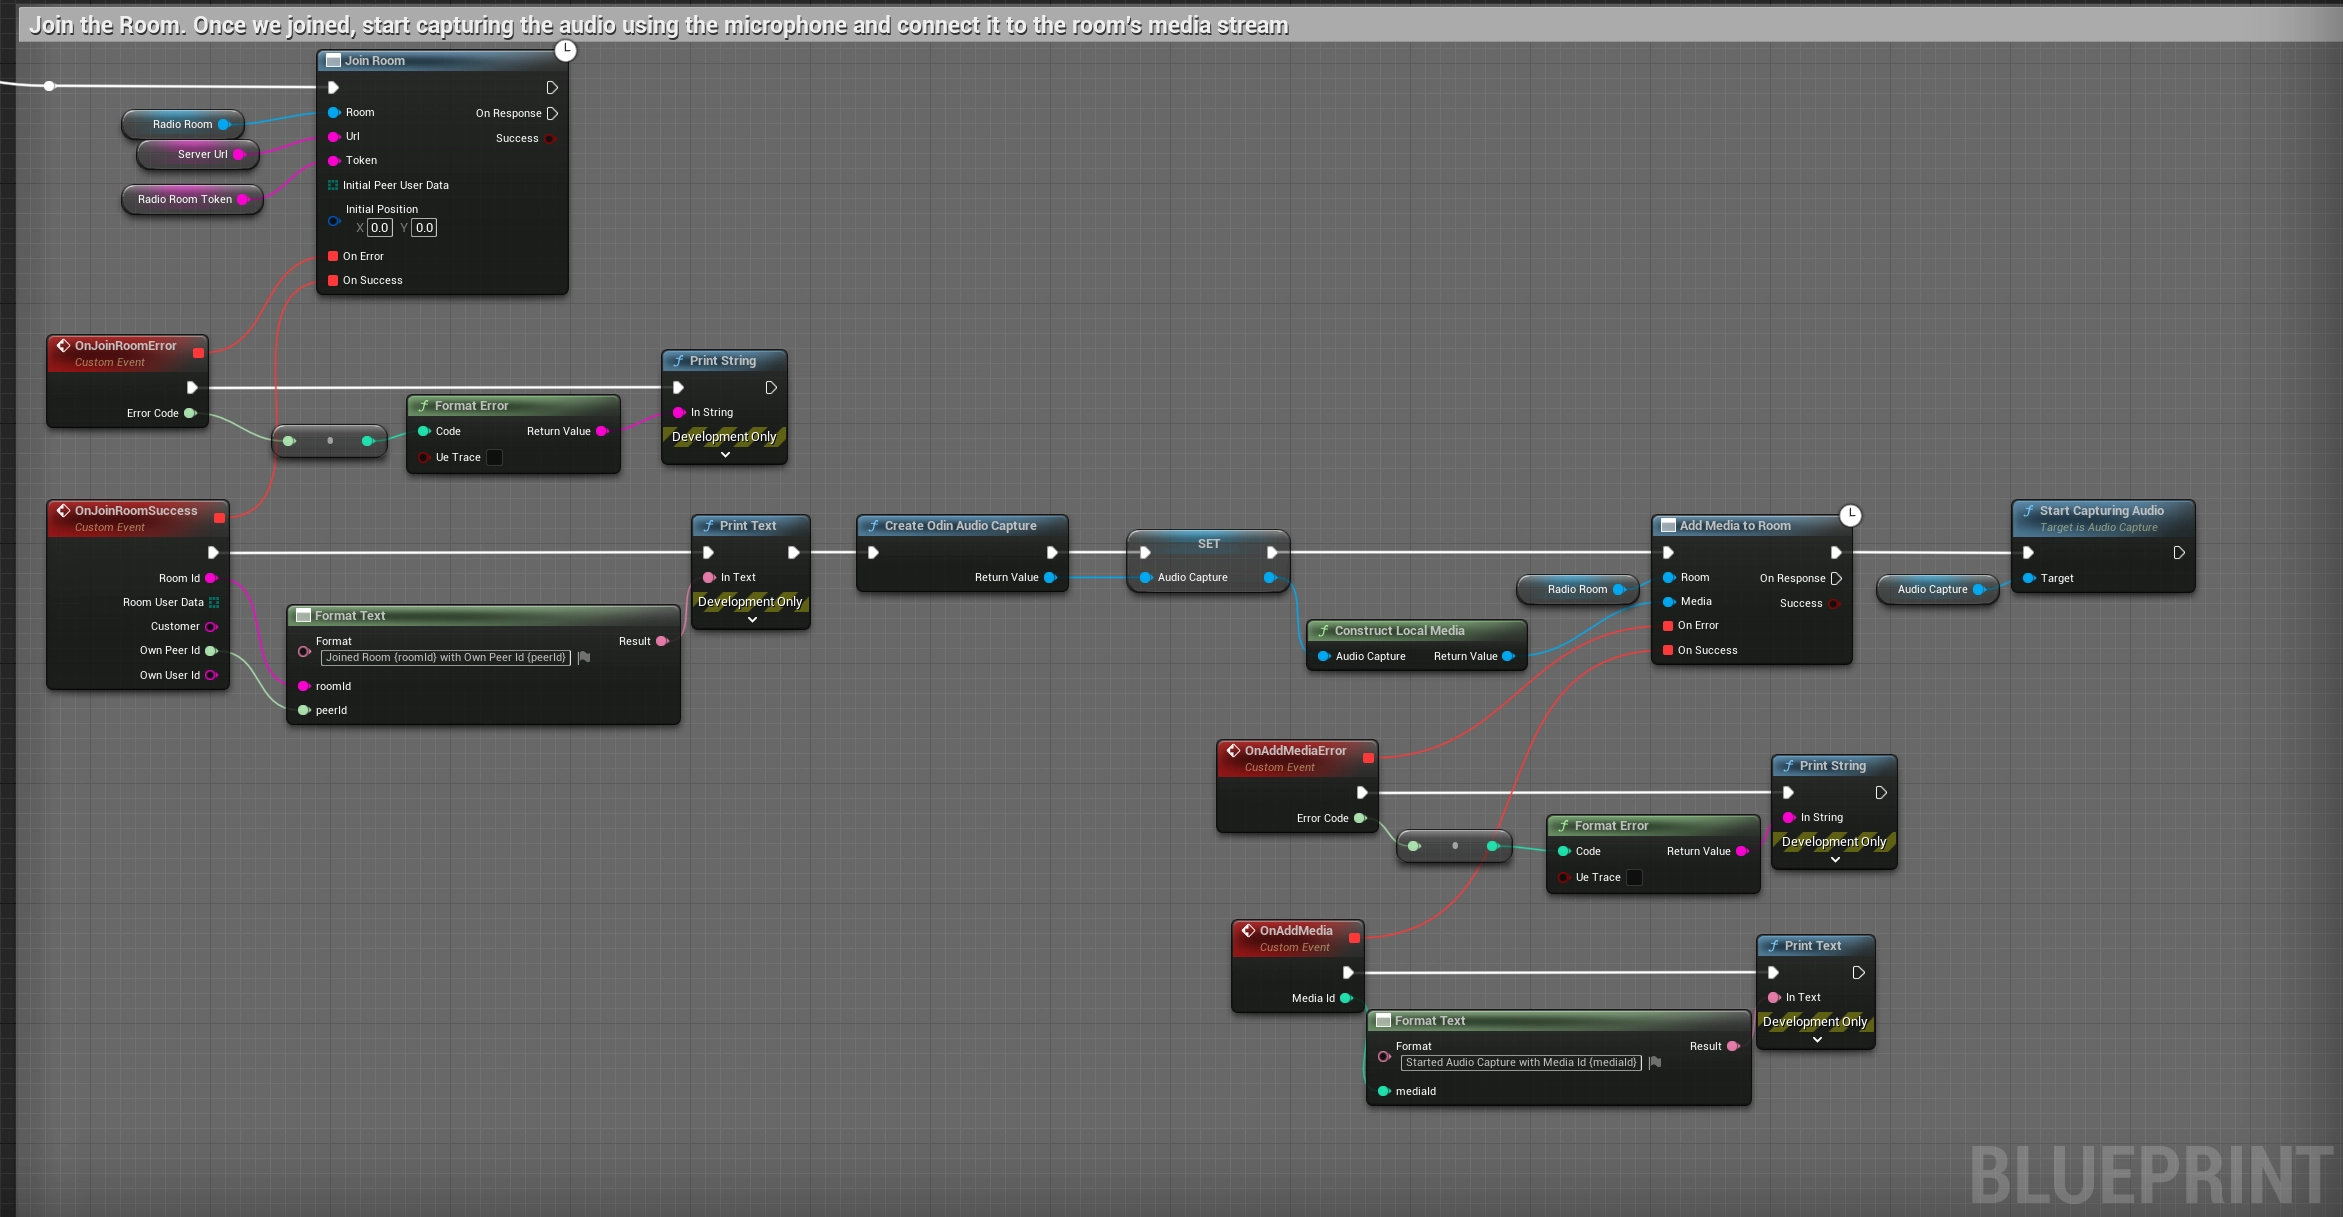
Blueprint for joining the Odin room
Please note, that we store a reference to the Odin Audio Capture object as a variable - we’re going to use it in the next sections.
Understanding Is Capturing Paused
The key to implementing Push-To-Talk in ODIN lies in the Is Capturing Paused
parameter of the Odin Audio Capture object. This parameter allows us to control the audio capture state – essentially enabling or disabling the microphone input on demand. It’s important to note that this functionality is specific to the Odin Audio Capture object and is not available in Unreal’s default Audio Capture object.
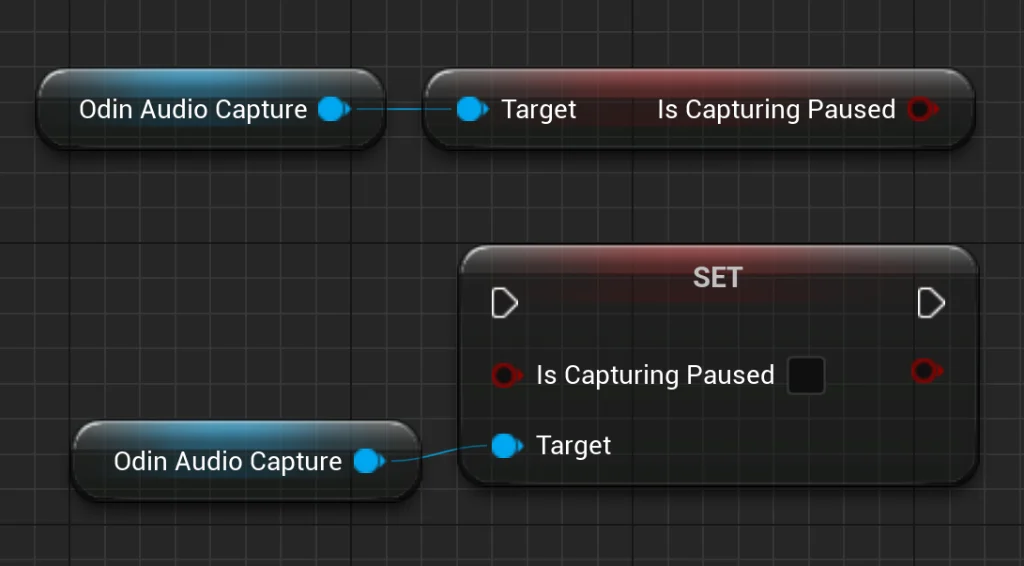
Get and Set Is Paused
We strongly advise against using the Stop Capturing Audio and Start Capturing Audio nodes provided by both Epic’s Audio Capture and the Odin Audio Capture objects. Recent updates, especially from Unreal Engine version 5.3 onwards, have revealed that employing these nodes to stop and start audio capture can lead to application crashes.
Furthermore, even in earlier versions of Unreal Engine, using these nodes has been observed to cause significant performance degradation. This issue stems from Epic’s underlying implementation, which involves destroying and subsequently recreating native audio capture references each time Stop Capturing Audio and Start Capturing Audio are called, respectively.
To ensure optimal performance and stability, especially for features like Push-To-Talk, we recommend utilizing the Is Capturing Paused parameter. This parameter is specifically optimized for such use cases, offering a more efficient and less resource-intensive approach to controlling audio capture in your game.
Setting Up the Input Action
For this guide, we’ll leverage Epic’s Enhanced Input System to define a Push-To-Talk Input Action. If you’re new to the Enhanced Input System, it’s highly recommended to first familiarize yourself with its functionalities by consulting the Unreal documentation.
Here is a step-by-step guide to setting up your Push-To-Talk Input Action using Enhanced Input:
- Create Input Mapping Context: If you haven’t already set up an Input Mapping Context in your project, begin by creating a new Input Mapping Context Data Asset. This context will hold your game’s specific input configurations.
- Define the Input Action: Next, create a new Input Action Data Asset. Set the
Value TypetoDigital (bool), which is ideal for binary actions like Push-To-Talk. - Bind the Input Action: Add the newly created Input Action to your Input Mapping Context. For this example, we’ll assign the
Tkey on the keyboard as the control binding for the Push-To-Talk action. - Activate the Input Mapping Context: To ensure your Input Action is recognized and processed, use the
Add Mapping Contextnode in your Player Controller. This action activates the Input Mapping Context containing your Push-To-Talk action.
Note: While this guide focuses on the Enhanced Input System, the Push-To-Talk implementation is also compatible with Unreal’s Legacy Input System. You can adapt this setup to whichever input system your project uses.
Integrating Push-To-Talk in Your Game
Once the Input Action is set up, follow these steps to integrate Push-To-Talk:
- Access the
Odin Audio Captureobject in your game. This should already be part of your existing ODIN setup. - Listen to the Enhanced Input Action event for the
PushToTalkaction we defined. You can do this in your character or controller blueprint. - In the event, depending on the Action Value (pressed or released), set the Is Capturing Paused
parameter of the
Odin Audio Captureobject. - Always check if the
OdinAudioCaptureobject reference is valid before setting the parameter to avoid Null Reference Errors.
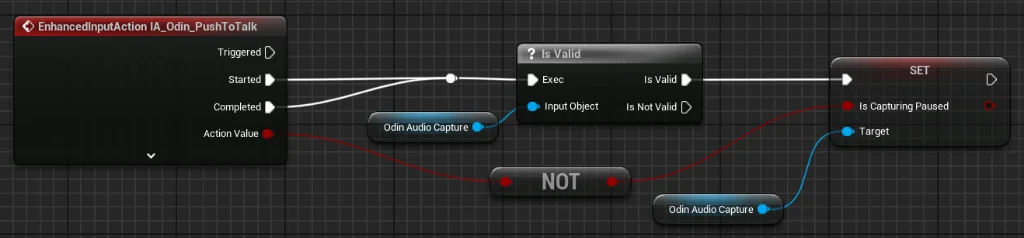
Blueprint implementation of Push-To-Talk.
Conclusion
With these steps, you’ve successfully integrated Push-To-Talk functionality in your Unreal Engine game using the ODIN plugin. This will enhance your game’s voice chat experience by giving players control over their microphone input.
For further information on Unreal with Odin Voice Chat, join our community discussions on Discord and explore our additional guides: